
To perform a time course simulation in COPASI, navigate to the Tasks → Time Course section in the object tree.
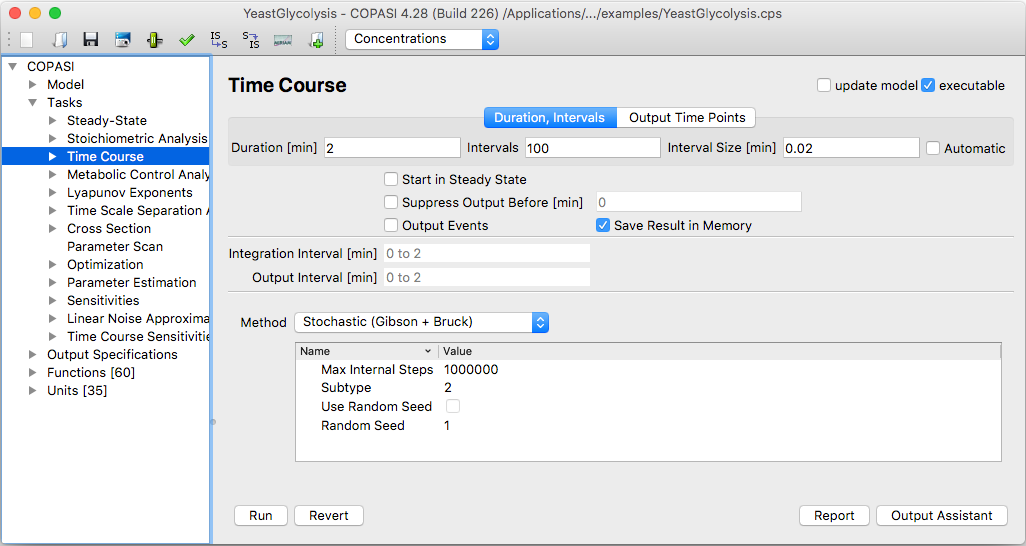 |
| Trajector Task Dialog |
In the Time Course widget, you can configure several parameters related to the simulation. For example, you can change the simulation’s total duration or set the number of intervals into which the time range is divided. Alternatively, you may specify the interval size directly; when you edit either the number of intervals or the interval size, the other value updates automatically. If you adjust the total duration, the number of intervals will remain the same and the interval size will change accordingly.
If you prefer to let the integrator automatically choose the step size, you can check the Automatic box. Alternatively, you may explicitly provide a list of times (space- or comma-separated) at which you want output from the solver.
The checkbox labeled Save Result in Memory tells COPASI to store the results of the time course simulation in memory for display in the result dialog. Because these results can consume significant memory, especially for larger models or high numbers of steps, you should consider disabling this option if system memory may be insufficient. If you disable this option, you must define a report to save the results.
Another adjustable setting in this dialog is the Start Output Time option. By default, COPASI records output across the entire simulation time; plots, reports, and the result dialog will reflect all time points calculated. If you only want to save simulation results after a certain time, activate the delayed checkbox and specify the time delay in the field provided. For example, if you simulate for 100 seconds but are only interested in the last 50 seconds, set a delay of 50. Outputs generated before this time will be discarded from all types of output.
The time course simulation is not forced to start at ${t}_{0} = 0$. Instead, the simulation begins at the initial model time, which is set in the General Model Settings dialog.
COPASI offers six different methods for time course simulation. For deterministic simulation, you may select the LSODA solver or its variant LSODAR. Stochastic time course simulations can be carried out using either the Gibson and Bruck method or the Tau-Leap method. Depending on your selected solver, several method-specific parameters are available in the table of parameter values. Detailed explanations of these parameters can be found in the methods section.
Beyond purely deterministic or stochastic simulations, COPASI also provides a hybrid method that combines both approaches. The hybrid method partitions the model based on particle counts in each reaction: reactions with many particles are handled deterministically, while those with few particles are simulated stochastically. Users can set the threshold that determines this division. Depending on your model, the hybrid approach may offer significant speed improvements over fully stochastic simulation, while maintaining greater accuracy for low particle number systems than a strictly deterministic approach. Note, however, that this method is still considered experimental. For more details, see the relevant methods documentation.
Three hybrid solver variants are available: the first uses LSODA for deterministic integration (Hybrid (LSODA)), and the second uses fourth-order Runge-Kutta integration (Hybrid (Runge-Kutta)), and another Hybrid (RK-45) supports events and specific partitioning.
Finally, simulation using Stochastic Differential Equations can be done, choosing the SDE Solver (RI5).
See also all Time Course Methods.
If you have not yet created a report definition, you can use the output assistant by clicking the button at the bottom of the time course dialog. After you create a report definition, you must associate it with an output file for COPASI to save results. This is done from the Report button in the time course dialog.
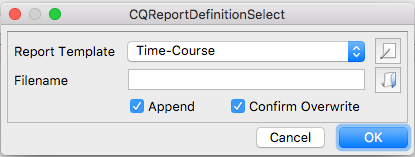 |
| Dialog to associate a Report with a File |
When the dialog opens, you can select which report to use (useful if you have created more than one), and browse to choose a file in which to save the report. You can also decide whether to append the report to an existing file, by default, COPASI will create a new file or overwrite an existing file, unless you check the Append checkbox.
After you have set all desired parameters, start the time course simulation by clicking Run. COPASI will display a progress bar during the simulation; the duration depends on factors such as your hardware, the method chosen, and the size of your model. When finished, results will appear in the report file you specified and, if you opted to keep results in memory, in a separate result dialog as well.
The Result dialog is found just below the Time Course branch in the object tree. Here, you can choose whether to display results as concentrations or particle numbers, and you can also save the results to a file. The key advantage of using a report over saving results from the Result dialog is customization: with a report, you can select exactly which species concentrations to include, whereas the Result dialog always saves all species concentrations in a fixed order, which cannot be changed during saving.
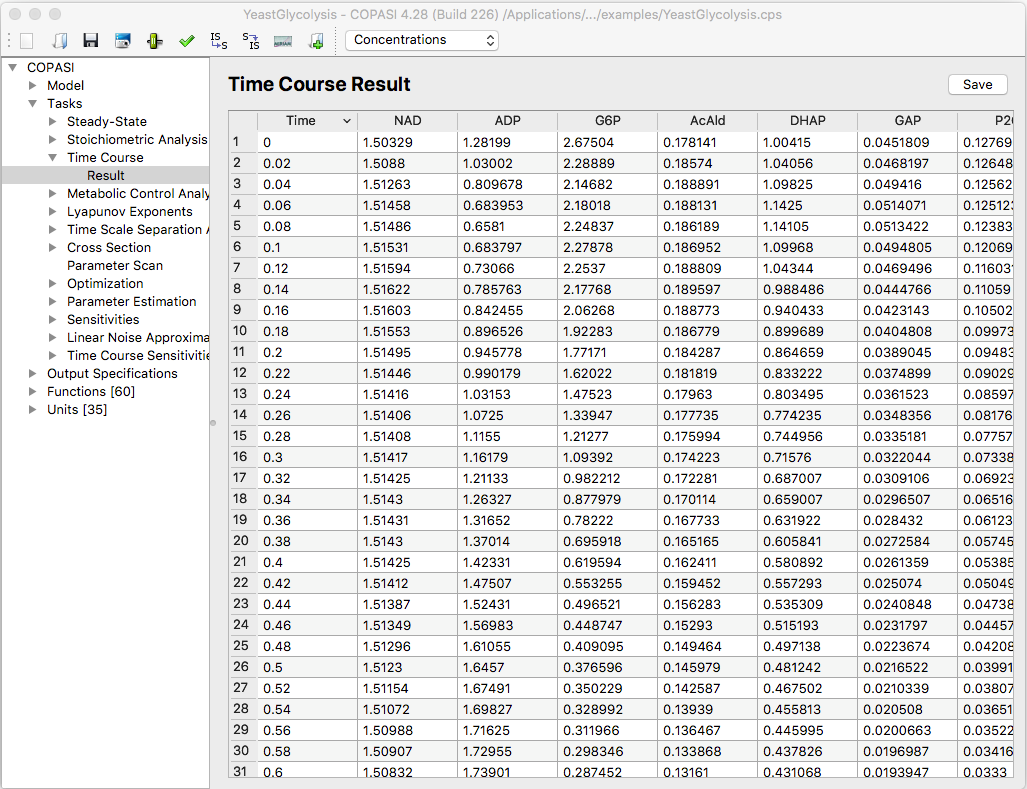 |
| Trajectory Task Results |